
Close the barriers and add a staff gate to fill your tank. To build a Planet Zoo 2 aquarium, start in Habitat Barrier → Aquarium, then add a guest gate for underwater viewing tunnels. Plan your tunnels and scenery before filling, and connect filtration to keep the water clean and set its salinity.
How do you build a Planet Zoo 2 aquarium and fill it with water?
Draw a closed Aquarium Barrier with Line or Curve, then place an Aquarium Staff Gate to trigger automatic filling.
- Select Habitat Barrier → Aquarium. Lay out the tank perimeter, leaving room for the viewing route you want.
- If you want tunnels, build them and your main scenery before finishing the enclosure. This is a useful construction order, not a compulsory one.
- Close the barrier and add the staff gate. Connect the gate to your path network so staff can enter.
With the Aquarium tool selected, curved glass walls outline the dry tank. The tank fills once the barrier is fully closed and staff access is added, so if your tank stays dry, check those two parts first.
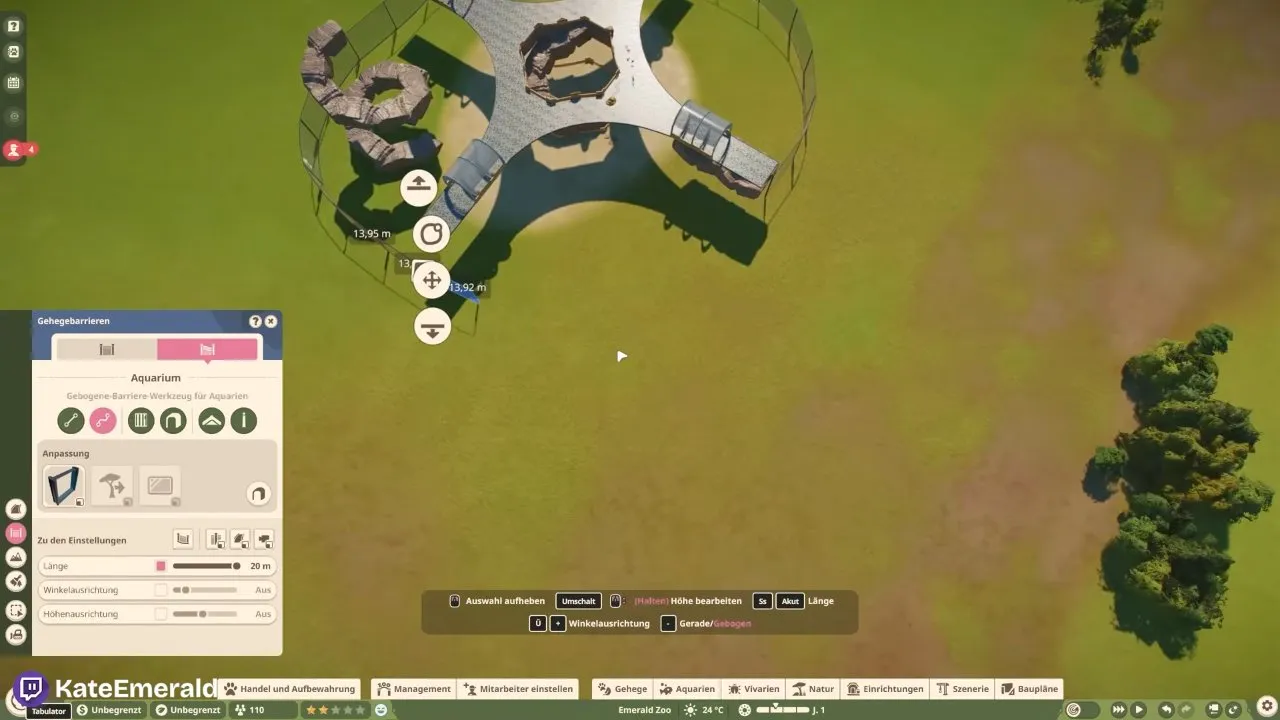
Staff gates can sit above ground level because staff enter the water in diving suits. Keep the path connection usable even if you hide the entrance with scenery.
How do you build Planet Zoo 2 underwater tunnels?
Add a guest gate to the aquarium and build a viewing tunnel through the water; the bottom Aquariums menu gives you access to the tunnel option.
With the tunnel tool active, you draw a curved route inside the dry enclosure and can set sections at different heights. For Planet Zoo 2 underwater paths, this aquarium tunnel tool is what creates the viewing route through the tank.
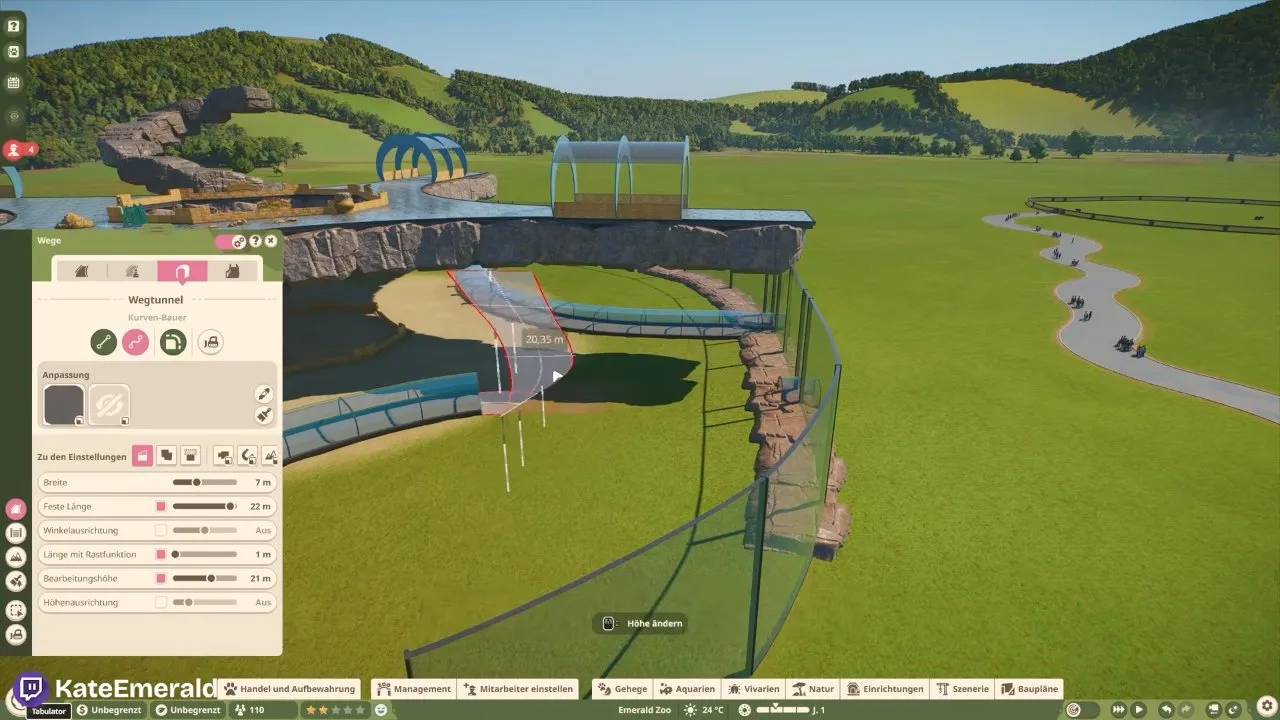
You can build tunnels at different heights, including within multistory or underground aquariums. Plan the route while you can still see the floor clearly. One player found this easier before adding water, and later lowered rocks that poked through the tunnel because the overlap looked awkward. Inspect scenery from the guest route before filling.
How do you connect aquarium filtration, and do you need water pumps?
Start by connecting a Water Filter directly to the node on the Aquarium Staff Gate through Edit Filtration Network.
The red No Connected Water Filter warning below identifies a missing filtration connection. A filled tank still needs this network; placing a filter nearby is only the start.
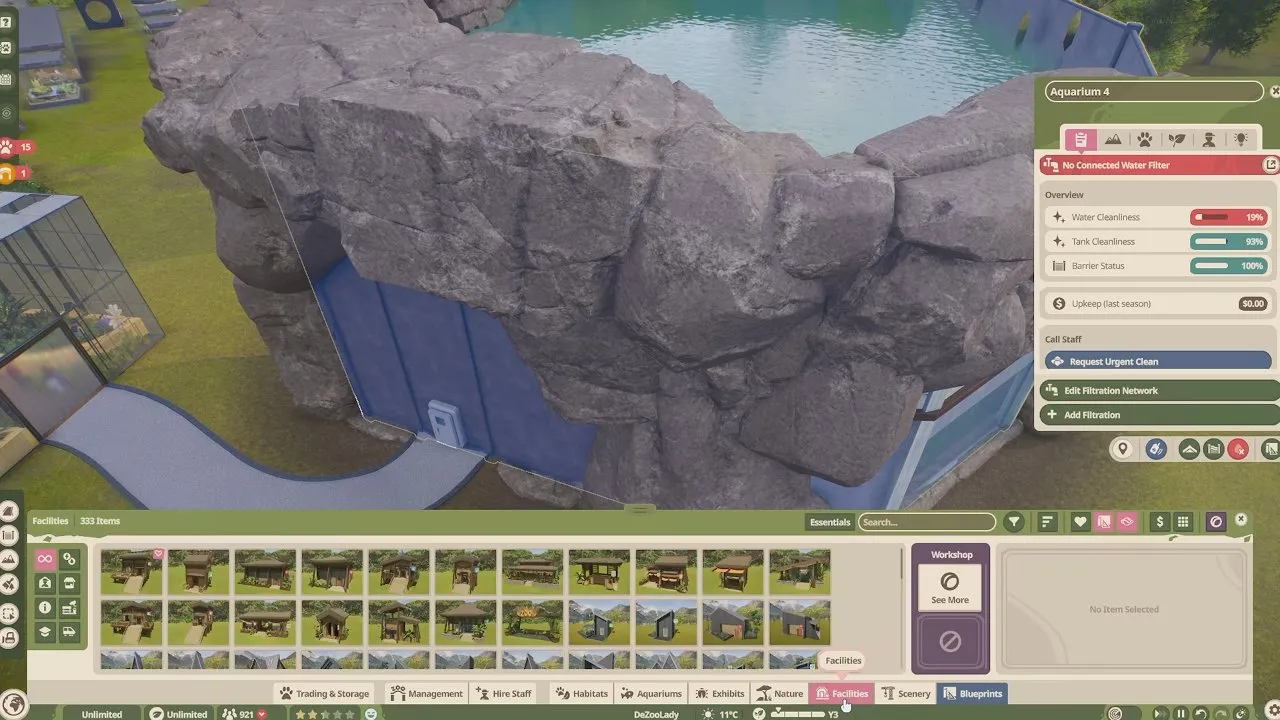
Direct staff-gate connection: recommended starting point
- Open Browser → Facilities → Utilities and place a Water Filter.
- Supply nearby power and leave its maintenance panel accessible by path.
- Select Edit Filtration Network and run a pipe between the filter node and the aquarium's staff-gate node.
- Check the network's connections and filtration supply against demand.
The missing-filter warning stays on while you position the utility, so placing it is not enough; connect it to the network too.
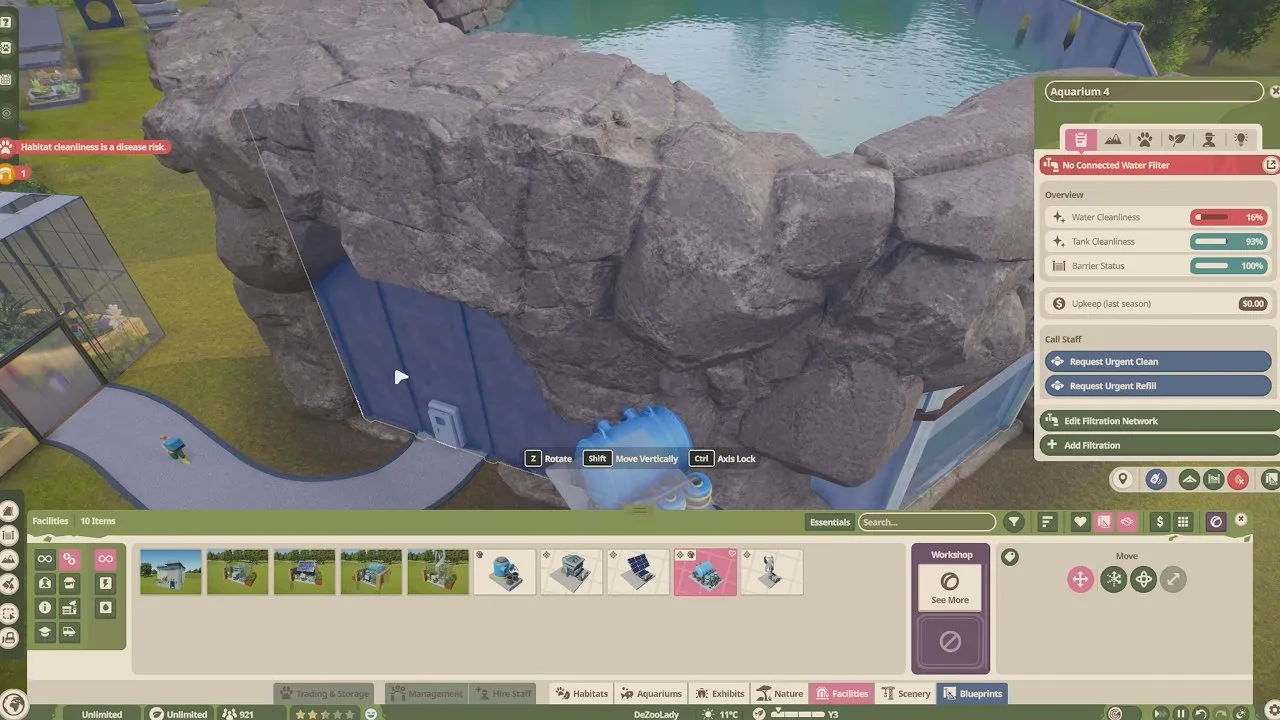
This direct connection follows the aquarium instructions, whose publication date is not displayed. Those instructions assign water pumps to natural water bodies in habitats.
Water-pump coverage: an alternative shown in early play
Some players place pumps around the aquarium so their radii cover it, then connect them to filtration. Even with full coverage you can still see an Insufficient Filtration warning, so check capacity as well.
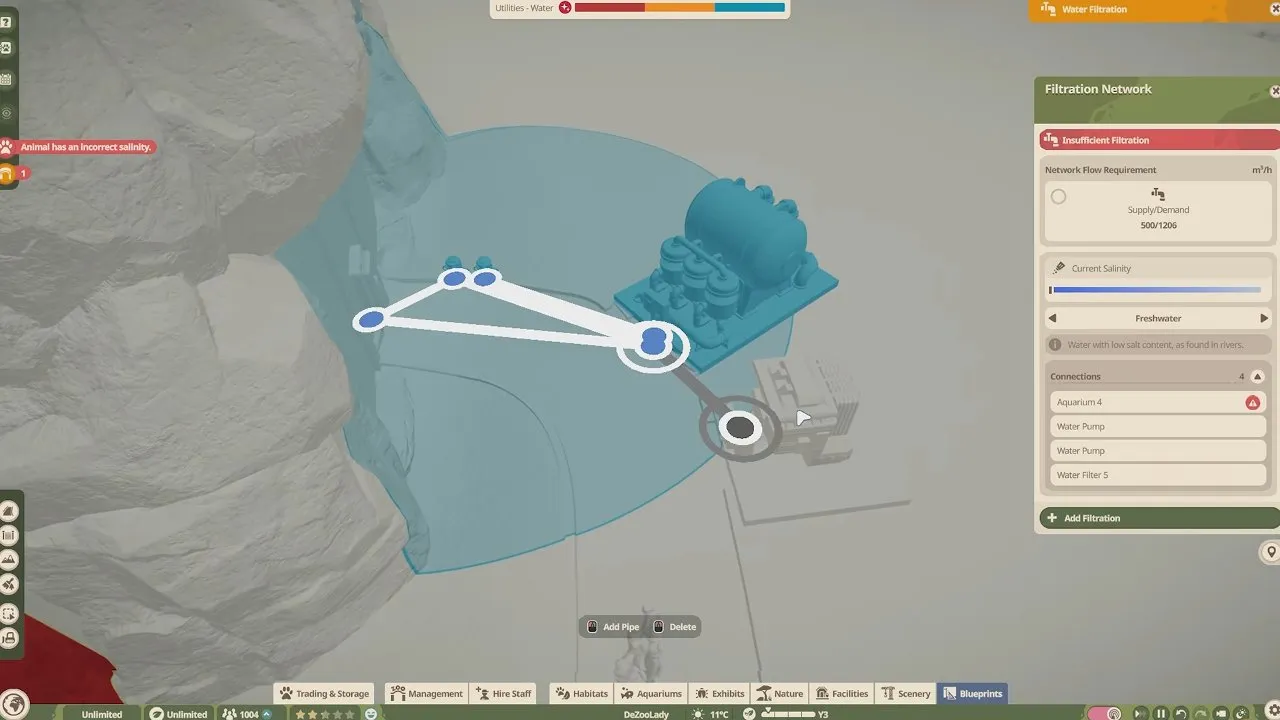
The next view shows pumps beside the staff gate with Insufficient Water Filtration still displayed. Check capacity as well as connections before adding more animals.
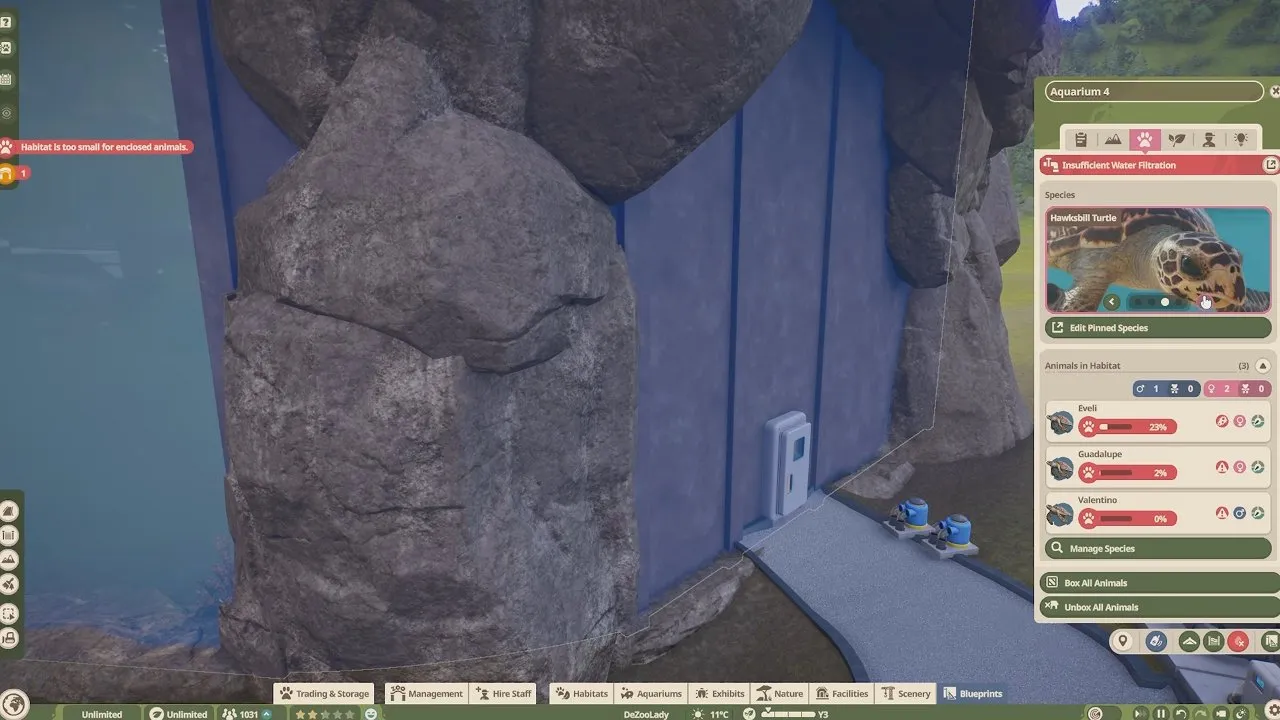
Start with the direct node connection and check your network's feedback before adding pumps.
How do you change aquarium water to freshwater, brackish or saltwater?
Set Freshwater, Brackish or Saltwater through the connected filtration network, matching your animals' requirements in the Zoopedia.
New aquariums default to Freshwater. On the filter panel you see Current Salinity: Freshwater and an Edit Filtration Network button, which is where you change the network settings.
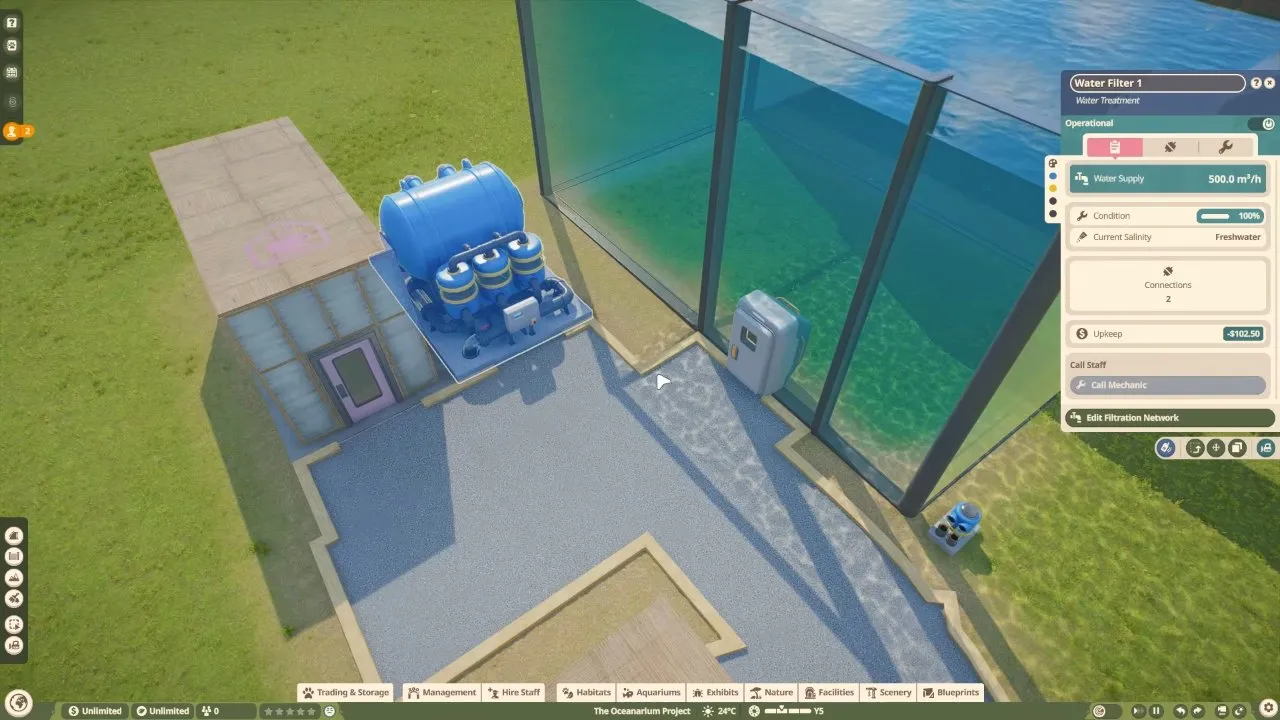
You choose the water type through the filtration network. Check your species instead of assuming the default will suit them. Changing network salinity affects all connected water bodies, so make sure they need the same conditions.
A green flow check does not mean the animals have suitable water. This network has enough filtration supply, yet the red Salinity Impacting Animal Welfare warning remains. Read flow and salinity separately.
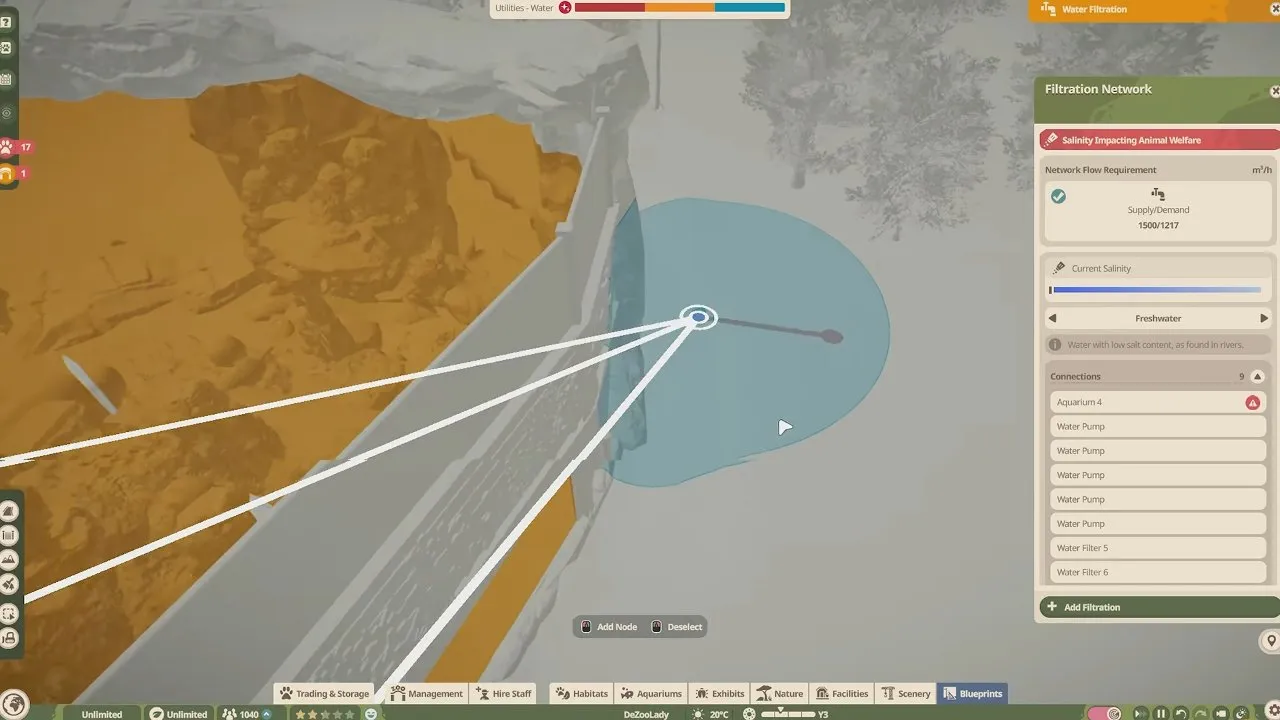
Water volume and animal numbers increase filtration demand. Keep filtration supply above demand; otherwise water cleanliness drops. Add connected filters when the network cannot keep up.
How do you finish and maintain an underwater aquarium?
Add the species' feeders, nests and enrichment, arrange a suitable environment, then transfer the animals and assign a Keeper.
Use the Aquarium tab for those care items and check the Planet Zoo 2 animals you want to house before committing to a shared tank. Aquatic foliage, scenery and terrain help meet environment needs. Rocks can also blend the staff entrance into the surroundings, provided you keep access usable.
Placed underwater beside swimming fish, rocks dress the tank interior without making the utility entrance the main feature.
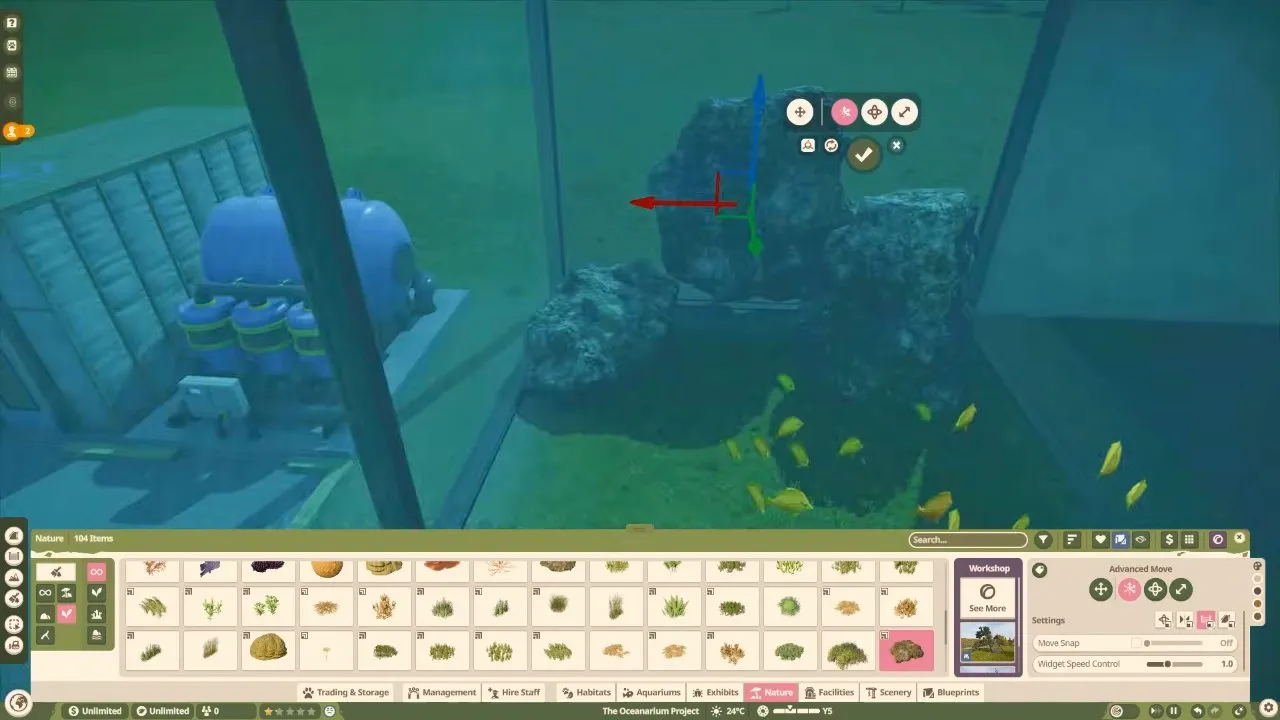
For temperature, power the staff gate and open Aquarium Info Panel → Environment. Match the species' Zoopedia range. Keepers restore tank cleanliness; Mechanics maintain barriers and filtration buildings. Dirty water raises disease risk, and neglected barriers can crack and leak.
To reshape an occupied tank, box the animals first, then select Drain Water below its information panel. Remove animals and water before editing the barrier. Planning your terrain with Planet Zoo 2 biomes before stocking the tank saves this extra work.
The completed view below shows water surrounding the curved viewing tunnel, with rock scenery submerged beneath the upper paths. That is the result you're building toward: an underwater guest route inside a filled aquarium, backed by suitable water conditions and staff care.
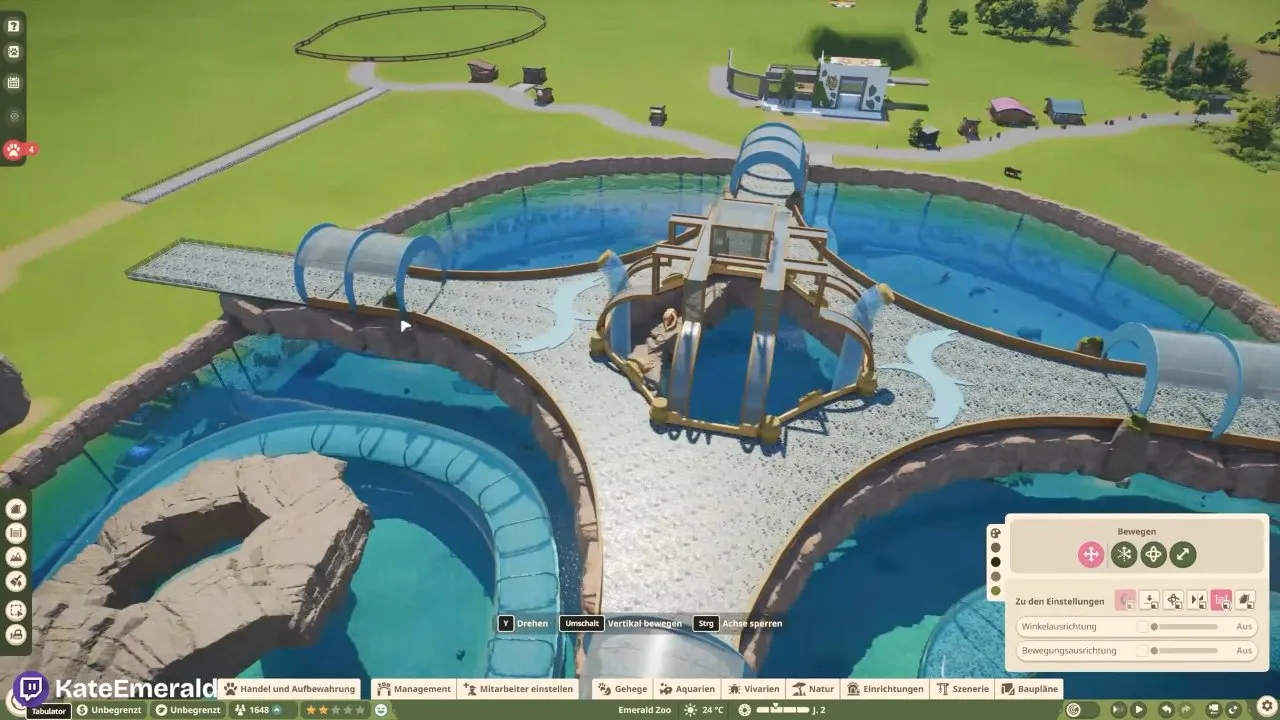
Once the tank and water conditions are working, continue with Planet Zoo 2 building themes to plan the surrounding architecture.